If you carry a tarp during day hikes, as the emergency shelter called for by the Ten Essentials, DD Hammocks' Ultralight series 3 by 3 tarp (3 by 2.9 meters, or 9.8 by 9.5 feet) is at the Cadillac end of your options. Although it's larger than the 9 by 7 foot tarp featured on my page about emergency shelter, it's 63 grams (2 ounces) lighter. The total weight of the tarp and stuff sack, minus the four provided stakes and guy lines, is 501 grams (17.7 ounces).

The setup shown above requires one long guy line and a minimum of six tent pegs. You can see me do the setup in a YouTube video, but I'll also provide instructions here.
Begin according to the instructions on the emergency shelter page, with the tarp's sewn center line serving as the ridge line. Before putting in a peg at Midpoint 2, slip your mostly collapsed second hiking pole under the back of the shelter. Set the pole so the handle end is up against the reinforcement patch located one loop in from the back edge of the tarp. Don't worry if the back edge of the tarp lifts off the ground. Now pull the loop corresponding to Midpoint 2 towards the front of the shelter and peg it to the ground. (This paragraph will make more sense if you watch the video.)
If you have additional tent pegs, use them to peg down the sides of the shelter. With this configuration, you can peg 13 of the tarp's 16 perimeter loops directly to the ground. That's in addition to the loop for the front guy line, which requires another peg. So if you want a shelter that's just about bombproof, take along 14 pegs! Or maybe take a smaller number, and make more pegs from sticks as needed. If you use all your pegs and still have gaps between the tarp and the ground, you can put small logs along the edges of the tarp to block those gaps. (Or just leave the gaps, to improve air circulation.)

The second photo is a look inside the shelter, which I put up in less than five minutes. With more effort I could have gotten the tarp edges to hug the ground a little better, but this was just a demo. What's impressive is how much room there is when you build a shelter this way—about nine feet across at the back, about the same distance front to back, and only slightly narrower at the front. Three people could bivvy with their gear, and for two people the shelter would feel huge. On YouTube you'll find that a lot of DD tarp users create a shorter tent with a smaller entry, but I like this configuration better. The shelter is so long that if the rain starts slanting in at the front, all you have to do is scooch toward the back. And with the open front, air circulation (and your sense of being outside) will be better.
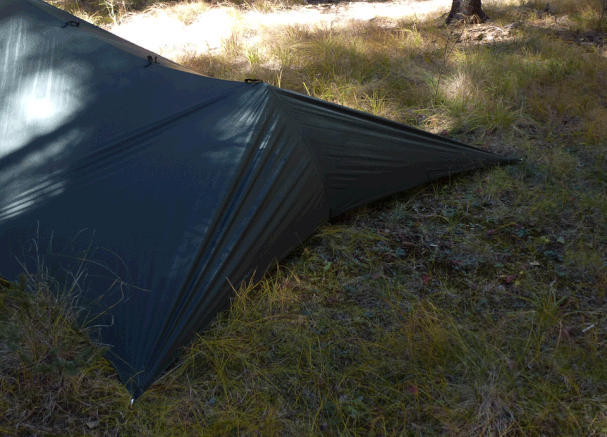
The final photo, above, shows what the back should look like. Having the second hiking pole as a short interior pole really opens up the interior at the back of the shelter.
The tarp is well made, with a taped center line seam and heavily reinforced tie points. It's expensive (as tarps go) but on the whole, this tarp is not just a suitable emergency shelter but a lightweight alternative to tent camping.
Can I think of an even better tarp for hiking? Yes: one made of Cuben fiber. Beyond my budget but if you're flush, that might be an option for you.
(Update: a different blog shows the tarp in a milder-weather awning configuration.)