Lost: Five Steps and Five Tips for Hikers

(This page provides the narrative for my YouTube video on the subject.)
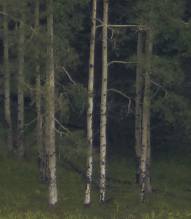
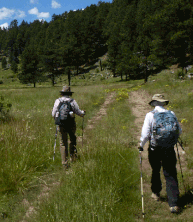
By “lost” I mean straying off your planned route and having no idea how to get back to it. Or maybe you’re lost because you didn’t have a plan. The worst part about being lost isn’t the failure to know your location, it’s not knowing which way to go to avoid dying. Getting lost is especially bad if you went out for a day hike and have to spend the night outside. Here are my thoughts about what to do if you do get lost, and what to do to prevent it.
Part 1: What to Do if You're Lost
Step 1. If you're not sure where you are, stop and assess.
I can think of two reasons people don’t want to admit that they may be lost. It’s a scary proposition and many people respond to fear by going into denial. Also, admitting that you led the group astray is admitting that you screwed up, and people go into denial about that. But admitting you have a problem is the first step in getting yourself out of trouble.
Once you admit the truth, the next thing to do is to stop hiking. If you’re lost and don’t stop, you’re traveling away from the last point where you weren’t lost. Slam on the brakes before you make things worse.
Once you’ve stopped, orient yourself—which means knowing which direction is which. Do you know where north is? If you have a compass, you do. Or maybe you can use the position of the sun. In the northern hemisphere it’s more or less east early in the morning, more or less south midday, and more or less west in the late afternoon. By the way, don’t look at moss on the sides of trees, or anything like that. Those folksy hints are mostly baloney.
At night, in the northern hemisphere, you can use the Big Dipper to find the North Star. If you can see them, that is. And why wander around at night, if you can hunker down until it’s light again.
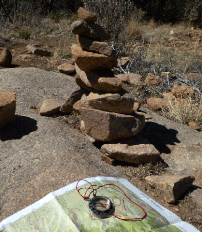
Once you orient yourself, locate yourself. Look at the terrain. Can you see landmarks such as mountain peaks? In the woods you may not see very far, but can you tell which way the ground slopes? If you’re at a creek, you can tell which way it flows. Now look at your map. Because you oriented yourself, you know how to turn the map so the top is pointing north. Then if something is north on the map, it’s north of you, and vice versa. Same for the other directions. After all that, does anything in the terrain match what’s on your map? With any luck, you’ll see roughly where you are -- which side of the mountain you’re on, for example. With just a bit more luck, you’ll see a straightforward way to get back on route.
If you can’t orient yourself using a compass or the sun, it’s possible to both orient and locate yourself by matching your map with the terrain. But orienting yourself without the map and locating yourself with the map provides two independent lines of evidence, which makes it harder to fool yourself about your location.
Step 2. If after assessing you’re still lost, come up with a plan.
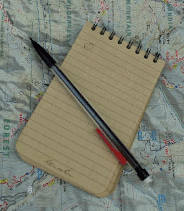
Let’s say you stopped and assessed, and you still have no idea where you are. One natural response is panic but in the wild, panic can lead to death. If you want to live, you need to rely on your cerebral cortex and bypass the more primitive parts of your brain. One way to fight panic is to work on a plan, since that makes you use your cerebral cortex. If you’re having trouble thinking clearly about the plan, write it down, because writing forces you to use your cerebral cortex even more.
As part of your planning, look at your map again and review your travel up to that point. Can you see where you took a wrong turn? If so, maybe you should head back there. Or if you have no idea how to get back on route, take time to debate which new route makes the most sense. Would a straight line out the woods take you over a cliff, for example? Take the time to get the plan right.
Once you have a solid plan, and only then, it’s time to start moving again. Well, almost. Because your next step should be...
Step 3: Tell Houston you have a problem.
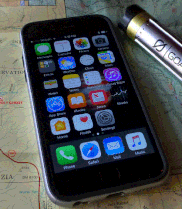
Maybe your plan is to ask for a rescue, because you have no idea how to get yourself out of the situation. In that case, your next step involves staying put and either calling 911 or pushing the SOS button on your satellite communicator. But let’s assume that your plan involves walking yourself out to safety.
In that case, your next step involves calling your guardian angel. You have one of those, right? It’s the person who has your hike information, including when to call for help if you’re not back. Let your guardian angel know that you have a problem, and what your plan is. Via cell phone if you can, or via satellite communicator if you don’t have cell service. You may not need a rescue yet, but it’s never too soon to start sharing information.
There are reasons to call now rather than later. First, if you have cell or satellite coverage now, you may not later. Second, if you have battery power now, you may not later. If you tell your guardian angel your plan and later stop communicating, that person will have specific information to share with your would-be rescuers.
A corollary of this step is to save your phone battery until you really need it. The best way to do that is to turn off your phone. If you’re using your phone for photos or other apps, see whether the apps work in airplane mode, since that draws less juice. And consider taking along a portable charger so if you do get lost, you won’t wind up staring at a dead phone. Needless to say, if you’re hiking in a group as you should, everyone in the group should bring a fully charged phone.

Step 4. Go back, not forward.
Yes, you’re lost, but earlier in the hike you weren’t lost. If your plan is to walk yourself out of trouble, your best bet is to retrace your steps. You’ll have your own footprints to follow, and you’ll recognize places you passed. On the other hand, once you’re lost, continuing the hike through a place you’ve never been is a pure crap shoot. So when you make your plan, as I recommend in Step 2, your best option is almost always to go back the way you came. This is important! Once you’re lost, surviving is what matters, so forget about your original goal.
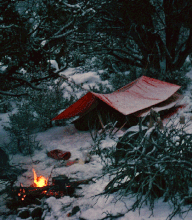
Step 5. If you’ll be stuck overnight, stop at least an hour before dark.
Even if you’re equipped for an overnight stay, don’t use the last hour of daylight in a desperate attempt to resolve your situation. Instead, use that daylight to make yourself as comfortable as possible. If you’re not equipped for the night ahead, give yourself even more time to prepare. If you need to stay warm, for example, you need to get a fire going and you need to gather enough firewood to last all night. If you need to improvise a shelter to protect you from wind or rain or both, it’ll take time to rig a shelter that does the job. Even if you have a flashlight, it’s a lot easier to get ready while there’s still plenty of daylight.
Part 2: The Tips

Tip 1: Don’t try to live off the land.
If you’re lost, don’t rely on wild food to survive. In most places, most of the time, there isn’t enough. A pint of raspberries has 130 calories, for example, and two trout filets have about 240 calories, but a moving hiker burns at least 2,000 calories a day, possibly more than twice that amount. If you harvest four pints of raspberries and catch three trout a day, day after day, in the long run you’ll starve to death. If you’re lost and have no food and no rescue is coming, your best bet is to walk yourself out before you starve.
Tip 2: Don’t split off individuals.
If you’re in a large group, it may make sense to leave most people in one spot while two or three experienced hikers go for help. But never, ever send a single individual off for help, and never leave a single individual behind, if you have any choice in the matter. It’s bad enough to be part of a group that’s lost, but being an individual who’s lost can be an easy death sentence.
Tip 3: Never separate yourself from your gear.
People do dumb things when they’re panicking, and one of them is to leave their gear somewhere. Problem is, as soon as you’re out of sight of your gear, you run the risk of never finding it again. Being lost is bad; being lost and separated from your gear is worse. Because this is a problem that happens again and again, if you’re lost, make a conscious effort to hang on to your gear.
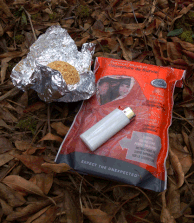
Tip 4: Have the gear you need only because you’re lost.
Suppose you go out for a day hike and get lost and it’s going to be a cold, wet night. Now suppose you brought along a lightweight tarp and can use it to create a waterproof shelter. That makes your situation a lot less grim.
Same story if you need to keep a fire going. Say you brought a fire starting kit, even though your plan was to eat a sandwich for lunch and spend the night in your own bed. The kit was something you took along on the assumption that you’d never need it. Sometimes “never” happens, so you might as well be prepared.
One option is to have a zip bag with a few lightweight items you’ll need if you get in trouble. You can throw the bag in the bottom of your pack whenever you go day hiking, and usually not think about it again until you’re home and putting things away.
Tip 5: Don’t get lost in the first place.
This last bit of advice is not as facetious as it sounds. Experienced hikers usually don’t get lost, because they take basic precautions such as the ones I’m about to describe.
Prepare for your hike, including by reading hike descriptions and looking at maps. For especially difficult hikes, don’t just determine a main route, look for escape routes to use if your planned route doesn’t work.
These days you can also use Google Earth to get a bird’s-eye view of the area you’ll be hiking, so you have a visual sense of that area even if you’ve never been there.
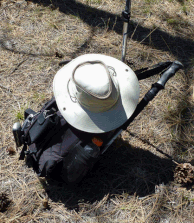
Take along the tools you needed to verify your location, within the technology available to you. At a minimum you need to have a topographic map and a compass, and you need to know how to use them. These days can you can also use a GPS unit, smartphone apps, and even a satellite locator, depending on what the hike entails. If you have this gear and know how to use it, it’s hard to be even slightly confused about where you are.
Stop and check your progress as you move along. If you keep verifying where you are, that limits how far you travel after you unknowingly screw up. In turn, that makes backtracking to your last known position that much faster. So don’t wait to think about your position until you suspect that you’re lost; keep verifying your position even when you’re sure you know where you are.
So yes, the best way to deal with being lost is to not get lost. That goal is within reach of everyone who hikes, because staying found is now 99 percent a matter of gear and preparation and 1 percent a matter of luck. If you do get lost anyway, I’ve mentioned a few ideas on how to survive the experience. If you take the trouble to acquire the skills, you probably won’t get lost in the first place.